
組件基礎
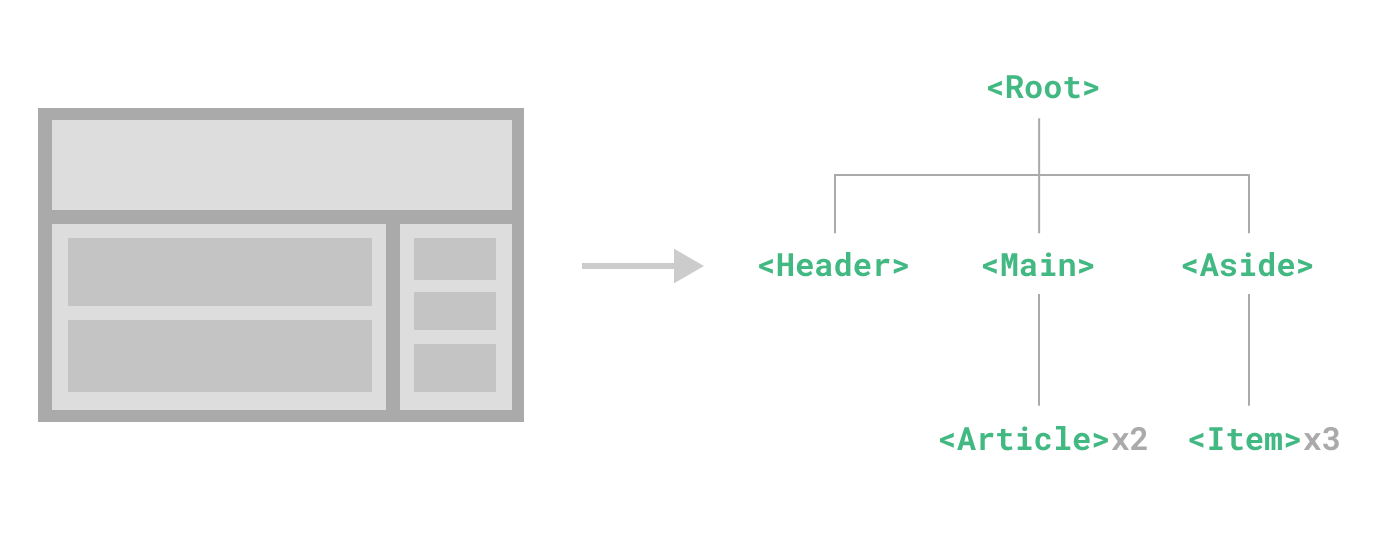
組件允許我們將 UI 劃分為獨立的、可重用的部分,並且可以對每個部分進行單獨的思考。在實際應用中,組件常常被組織成層層嵌套的樹狀結構:
這和我們嵌套 HTML 元素的方式相似,Vue 實現了自己的組件模型,使我們可以在每個組件內封裝自定義內容與邏輯。Vue 同樣也能很好地配合原生 Web Component。如果你想知道 Vue 組件與原生 Web Components 之間的關係,可以閱讀此章節。
定義一個組件
當使用構建步驟時,我們一般會將 Vue 組件定義在一個單獨的 .vue 文件中,這被叫做單文件組件 (簡稱 SFC):
vue
<script setup>
import { ref } from 'vue'

const count = ref(0)
</script>

<template>
  <button @click="count++">You clicked me {{ count }} times.</button>
</template>
當不使用構建步驟時,一個 Vue 組件以一個包含 Vue 特定選項的 JavaScript 對象來定義:
js
import { ref } from 'vue'

export default {
  setup() {
    const count = ref(0)
    return { count }
  },
  template: `
    <button @click="count++">
      You clicked me {{ count }} times.
    </button>`
  // 也可以針對一個 DOM 內聯模板:
  // template: '#my-template-element'
}
這裡的模板是一個內聯的 JavaScript 字符串,Vue 將會在運行時編譯它。你也可以使用 ID 選擇器來指向一個元素 (通常是原生的 <template> 元素),Vue 將會使用其內容作為模板來源。
上面的例子中定義了一個組件,並在一個 .js 文件裡默認導出了它自己,但你也可以通過具名導出在一個文件中導出多個組件。
使用組件
TIP
我們會在接下來的指引中使用 SFC 語法,無論你是否使用構建步驟,組件相關的概念都是相同的。示例一節中展示了兩種場景中的組件使用情況。
要使用一個子組件,我們需要在父組件中導入它。假設我們把計數器組件放在了一個叫做 ButtonCounter.vue 的文件中,這個組件將會以默認導出的形式被暴露給外部。
vue
<script setup>
import ButtonCounter from './ButtonCounter.vue'
</script>

<template>
  <h1>Here is a child component!</h1>
  <ButtonCounter />
</template>
通過 <script setup>,導入的組件都在模板中直接可用。
當然,你也可以全局地註冊一個組件,使得它在當前應用中的任何組件上都可以使用,而不需要額外再導入。關於組件的全局註冊和局部註冊兩種方式的利弊,我們放在了組件註冊這一章節中專門討論。
組件可以被重用任意多次:
template
<h1>Here is a child component!</h1>
<ButtonCounter />
<ButtonCounter />
<ButtonCounter />你會注意到,每當點擊這些按鈕時,每一個組件都維護著自己的狀態,是不同的 count。這是因為每當你使用一個組件,就創建了一個新的實例。
在單文件組件中,推薦為子組件使用 PascalCase 的標籤名,以此來和原生的 HTML 元素作區分。雖然原生 HTML 標籤名是不區分大小寫的,但 Vue 單文件組件是可以在編譯中區分大小寫的。我們也可以使用 /> 來關閉一個標籤。
如果你是直接在 DOM 中書寫模板 (例如原生 <template> 元素的內容),模板的編譯需要遵從瀏覽器中 HTML 的解析行為。在這種情況下,你應該需要使用 kebab-case 形式並顯式地關閉這些組件的標籤。
template
<!-- 如果是在 DOM 中書寫該模板 -->
<button-counter></button-counter>
<button-counter></button-counter>
<button-counter></button-counter>
請看 DOM 內模板解析注意事項了解更多細節。
傳遞 props
如果我們正在構建一個博客,我們可能需要一個表示博客文章的組件。我們希望所有的博客文章分享相同的視覺佈局,但有不同的內容。要實現這樣的效果自然必須向組件中傳遞數據,例如每篇文章標題和內容,這就會使用到 props。
Props 是一種特別的 attributes,你可以在組件上聲明註冊。要傳遞給博客文章組件一個標題,我們必須在組件的 props 列表上聲明它。這裡要用到 defineProps 宏:
vue
<!-- BlogPost.vue -->
<script setup>
defineProps(['title'])
</script>

<template>
  <h4>{{ title }}</h4>
</template>
defineProps 是一個僅 <script setup> 中可用的編譯宏命令,並不需要顯式地導入。聲明的 props 會自動暴露給模板。defineProps 會返回一個對象,其中包含了可以傳遞給組件的所有 props:
js
const props = defineProps(['title'])
console.log(props.title)
TypeScript 用戶請參考:為組件 props 標註類型
如果你沒有使用 <script setup>,props 必須以 props 選項的方式聲明,props 對象會作為 setup() 函數的第一個參數被傳入:
js
export default {
  props: ['title'],
  setup(props) {
    console.log(props.title)
  }
}
一個組件可以有任意數量的 props,默認情況下,所有 prop 都接受任意類型的值。
當一個 prop 被註冊後,可以像這樣以自定義 attribute 的形式傳遞數據給它:
template
<BlogPost title="My journey with Vue" />
<BlogPost title="Blogging with Vue" />
<BlogPost title="Why Vue is so fun" />
在實際應用中,我們可能在父組件中會有如下的一個博客文章數組:
js
const posts = ref([
  { id: 1, title: 'My journey with Vue' },
  { id: 2, title: 'Blogging with Vue' },
  { id: 3, title: 'Why Vue is so fun' }
])
這種情況下,我們可以使用 v-for 來渲染它們:
template
<BlogPost
  v-for="post in posts"
  :key="post.id"
  :title="post.title"
/>留意我們是如何使用 v-bind 語法 (:title="post.title") 來傳遞動態 prop 值的。當事先不知道要渲染的確切內容時,這一點特別有用。
以上就是目前你需要了解的關於 props 的全部了。如果你看完本章節後還想知道更多細節,我們推薦你深入閱讀關於 props 的完整指引。
監聽事件
讓我們繼續關注我們的 <BlogPost> 組件。我們會發現有時候它需要與父組件進行交互。例如,要在此處實現無障礙訪問的需求,將博客文章的文字能夠放大,而頁面的其餘部分仍使用默認字號。
在父組件中,我們可以添加一個 postFontSize ref 來實現這個效果:
js
const posts = ref([
  /* ... */
])

const postFontSize = ref(1)
在模板中用它來控制所有博客文章的字體大小:
template
<div :style="{ fontSize: postFontSize + 'em' }">
  <BlogPost
    v-for="post in posts"
    :key="post.id"
    :title="post.title"
   />
</div>
然後,給 <BlogPost> 組件添加一個按鈕:
vue
<!-- BlogPost.vue, 省略了 <script> -->
<template>
  <div class="blog-post">
    <h4>{{ title }}</h4>
    <button>Enlarge text</button>
  </div>
</template>
這個按鈕目前還沒有做任何事情,我們想要點擊這個按鈕來告訴父組件它應該放大所有博客文章的文字。要解決這個問題,組件實例提供了一個自定義事件系統。父組件可以通過 v-on 或 @ 來選擇性地監聽子組件上拋的事件,就像監聽原生 DOM 事件那樣:
template
<BlogPost
  ...
  @enlarge-text="postFontSize += 0.1"
 />
子組件可以通過調用內置的 $emit 方法,通過傳入事件名稱來拋出一個事件:
vue
<!-- BlogPost.vue, 省略了 <script> -->
<template>
  <div class="blog-post">
    <h4>{{ title }}</h4>
    <button @click="$emit('enlarge-text')">Enlarge text</button>
  </div>
</template>
因為有了 @enlarge-text="postFontSize += 0.1" 的監聽,父組件會接收這一事件,從而更新 postFontSize 的值。
我們可以通過 defineEmits 宏來聲明需要拋出的事件:
vue
<!-- BlogPost.vue -->
<script setup>
defineProps(['title'])
defineEmits(['enlarge-text'])
</script>這聲明了一個組件可能觸發的所有事件,還可以對事件的參數進行驗證。同時,這還可以讓 Vue 避免將它們作為原生事件監聽器隱式地應用於子組件的根元素。
和 defineProps 類似,defineEmits 僅可用於 <script setup> 之中,並且不需要導入,它返回一個等同於 $emit 方法的 emit 函數。它可以被用於在組件的 <script setup> 中拋出事件,因為此處無法直接訪問 $emit:
vue
<script setup>
const emit = defineEmits(['enlarge-text'])

emit('enlarge-text')
</script>
TypeScript 用戶請參考:為組件 emits 標註類型
如果你沒有在使用 <script setup>,你可以通過 emits 選項定義組件會拋出的事件。你可以從 setup() 函數的第二個參數,即 setup 上下文對象上訪問到 emit 函數:
js
export default {
  emits: ['enlarge-text'],
  setup(props, ctx) {
    ctx.emit('enlarge-text')
  }
}以上就是目前你需要了解的關於組件自定義事件的所有知識了。如果你看完本章節後還想知道更多細節,請深入閱讀組件事件章節。
通過插槽來分配內容
一些情況下我們會希望能和 HTML 元素一樣向組件中傳遞內容:
template
<AlertBox>
  Something bad happened.
</AlertBox>
我們期望能渲染成這樣:
This is an Error for Demo Purposes
Something bad happened.
這可以通過 Vue 的自定義 <slot> 元素來實現:
vue
<!-- AlertBox.vue -->
<template>
  <div class="alert-box">
    <strong>This is an Error for Demo Purposes</strong>
    <slot />
  </div>
</template>

<style scoped>
.alert-box {
  /* ... */
}
</style>
如上所示,我們使用 <slot> 作為一個佔位符,父組件傳遞進來的內容就會渲染在這裡。
以上就是目前你需要了解的關於插槽的所有知識了。如果你看完本章節後還想知道更多細節,請深入閱讀組件插槽章節。
動態組件
有些場景會需要在兩個組件間來回切換,例如 Tab 界面:
上面的例子是通過 Vue 的 <component> 元素和特殊的 is attribute 實現的:
template
<!-- currentTab 改變時組件也改變 -->
<component :is="tabs[currentTab]"></component>
在上面的例子中,被傳給 :is 的值可以是以下幾種:
- 被註冊的組件名
- 導入的組件對象
你也可以使用 is attribute 來創建一般的 HTML 元素。
當使用 <component :is="..."> 來在多個組件間作切換時,被切換掉的組件會被卸載。我們可以通過 <KeepAlive> 組件強制讓被切換掉的組件仍然保持“存活”的狀態。
DOM 內模板解析注意事項
如果你想在 DOM 中直接書寫 Vue 模板,Vue 則必須從 DOM 中獲取模板字符串。由於瀏覽器的原生 HTML 解析行為限制,有一些需要注意的事項。
TIP
請注意下面討論只適用於直接在 DOM 中編寫模板的情況。如果你使用來自以下來源的字符串模板,就不需要顧慮這些限制了:
- 單文件組件
- 內聯模板字符串 (例如
template: '...') <script type="text/x-template">
大小寫區分
HTML 標籤和屬性名稱是不分大小寫的,所以瀏覽器會把任何大寫的字符解釋為小寫。這意味著當你使用 DOM 內的模板時,無論是 PascalCase 形式的組件名稱、camelCase 形式的 prop 名稱還是 v-on 的事件名稱,都需要轉換為相應等價的 kebab-case (短橫線連字符) 形式:
js
// JavaScript 中的 camelCase
const BlogPost = {
  props: ['postTitle'],
  emits: ['updatePost'],
  template: `
    <h3>{{ postTitle }}</h3>
  `
}
template
<!-- HTML 中的 kebab-case -->
<blog-post post-title="hello!" @update-post="onUpdatePost"></blog-post>
閉合標籤
我們在上面的例子中已經使用過了閉合標籤 (self-closing tag):
template
<MyComponent />這是因為 Vue 的模板解析器支持任意標籤使用 /> 作為標籤關閉的標誌。
然而在 DOM 內模板中,我們必須顯式地寫出關閉標籤:
template
<my-component></my-component>這是由於 HTML 只允許一小部分特殊的元素省略其關閉標籤,最常見的就是 <input> 和 <img>。對於其他的元素來說,如果你省略了關閉標籤,原生的 HTML 解析器會認為開啟的標籤永遠沒有結束,用下面這個代碼片段舉例來說:
template
<my-component /> <!-- 我們想要在這裡關閉標籤... -->
<span>hello</span>
將被解析為:
template
<my-component>
  <span>hello</span>
</my-component> <!-- 但瀏覽器會在這裡關閉標籤 -->
元素位置限制
某些 HTML 元素對於放在其中的元素類型有限制,例如 <ul>,<ol>,<table> 和 <select>,相應的,某些元素僅在放置於特定元素中時才會顯示,例如 <li>,<tr> 和 <option>。
這將導致在使用帶有此類限制元素的組件時出現問題。例如:
template
<table>
  <blog-post-row></blog-post-row>
</table>
自定義的組件 <blog-post-row> 將作為無效的內容被忽略,因而在最終呈現的輸出中造成錯誤。我們可以使用特殊的 is attribute 作為一種解決方案:
template
<table>
  <tr is="vue:blog-post-row"></tr>
</table>
TIP
當使用在原生 HTML 元素上時,is 的值必須加上前綴 vue: 才可以被解析為一個 Vue 組件。為了避免和原生的自定義內置元素相混淆,這一點是必要的。
以上就是你需要了解的關於 DOM 內模板解析的所有注意事項,同時也是 Vue 基礎部分的所有內容。祝賀你!雖然還有很多需要學習的,但你可以先暫停一下,去用 Vue 做一些有趣的東西,或者研究一些示例。
完成了本頁的閱讀後,回顧一下你剛才所學到的知識,如果還想知道更多細節,我們推薦你繼續閱讀關於組件的完整指引。